Why Soil Health Matters in the Pacific Northwest
Great gardens start with great soil. This isn’t just gardening wisdom—it’s biological reality. Healthy soil teems with billions of microorganisms, fungi, and invertebrates that form a living system supporting plant growth. In the Pacific Northwest, where heavy clay dominates much of the Puget Sound region and winter rains leach nutrients rapidly, building and maintaining this living soil system requires specific strategies tailored to our unique conditions.
Whether you’re working with dense Seattle clay, sandy Eastside soil, or the rocky glacial till common throughout the region, this guide will help you create the rich, living soil that produces abundant harvests and healthy plants for years to come.
Understanding Pacific Northwest Soil Types
Western Washington Clay
The most common soil challenge in the Seattle area is heavy clay. This dense soil holds water in winter, creating soggy conditions that rot roots, then bakes hard in summer, preventing root penetration and water infiltration. Signs of clay soil include:
- Standing water after rain that takes more than 24 hours to drain
- Soil that forms a ribbon when rolled between fingers
- Soil that clumps when wet and cracks when dry
- A shiny, slick surface when wet
- Difficulty pushing a shovel or fork into the ground
Despite its challenges, clay soil holds nutrients well once you improve its structure. The goal isn’t to replace clay but to create better drainage and aeration while preserving its nutrient-holding capacity. This takes time—expect several years of consistent amendment before clay becomes the “improved clay loam” that grows excellent vegetables.
Sandy and Glacial Soils
Parts of the Eastside and areas with glacial deposits have sandy or gravelly soil that drains quickly but doesn’t hold water or nutrients. Signs include:
- Water disappearing immediately after watering
- Plants wilting quickly during dry spells despite recent watering
- Soil that feels gritty and doesn’t clump when squeezed
- Visible sand or gravel particles
- Light color, often tan or gray
Sandy soil needs organic matter to improve water and nutrient retention. Unlike clay, which needs loosening, sandy soil needs binding—organic matter acts as a sponge, holding moisture and nutrients in the root zone. Frequent, moderate amendments work better than occasional heavy applications because decomposition happens faster in well-drained soil.
Glacial Till
Much of the Puget Sound region sits on glacial deposits—a challenging mixture of clay, sand, gravel, and sometimes large rocks left behind when ice sheets retreated. This soil varies dramatically within short distances, sometimes within the same garden bed.
Working with glacial till often requires removing rocks and stones, testing drainage in different areas, and treating different zones according to their specific needs. Raised beds filled with imported soil may be the most practical solution for rocky areas.
Soil Testing: Know What You’re Working With
Before investing in amendments, test your soil. A soil test reveals pH level, nutrient content, organic matter percentage, and sometimes lead or other contaminants. This information prevents wasting money on unneeded amendments and identifies deficiencies that could limit plant growth.
How to Get Your Soil Tested
The WSU Extension offers affordable soil testing through their Puyallup laboratory. Collection is simple:
- Collect samples from multiple locations in your garden (5-10 spots for a typical vegetable garden)
- Use a clean trowel to collect soil from 6-8 inches deep
- Mix samples together in a clean bucket
- Allow to air dry if very wet
- Submit 1-2 cups of the mixed sample
Results typically return within two weeks, including recommendations for your specific crop type. Test every 2-3 years or when problems arise.
Understanding Soil Test Results
pH: Most vegetables prefer pH 6.0-7.0 (slightly acidic to neutral). Pacific Northwest soils often test acidic due to our heavy rainfall. Low pH (below 6.0) limits nutrient availability—even nutrient-rich soil may not support plant growth if pH is wrong.
Nitrogen (N): The nutrient plants need most, but also the most mobile—it leaches with rain and must be replenished regularly. Soil tests rarely measure nitrogen because levels change rapidly; instead, apply nitrogen based on crop needs and visual symptoms.
Phosphorus (P): Essential for root development and flowering. Pacific Northwest soils often contain adequate phosphorus, though it may be bound in unavailable forms in cold or acidic soil. Only add phosphorus if testing shows deficiency.
Potassium (K): Important for overall plant health and disease resistance. Most Pacific Northwest soils contain adequate potassium, but heavy feeding crops may deplete it over time.
Organic matter: Ideal levels are 3-5% for vegetable gardens. Higher is generally better. Organic matter improves soil structure, water retention, and nutrient availability while feeding soil organisms.
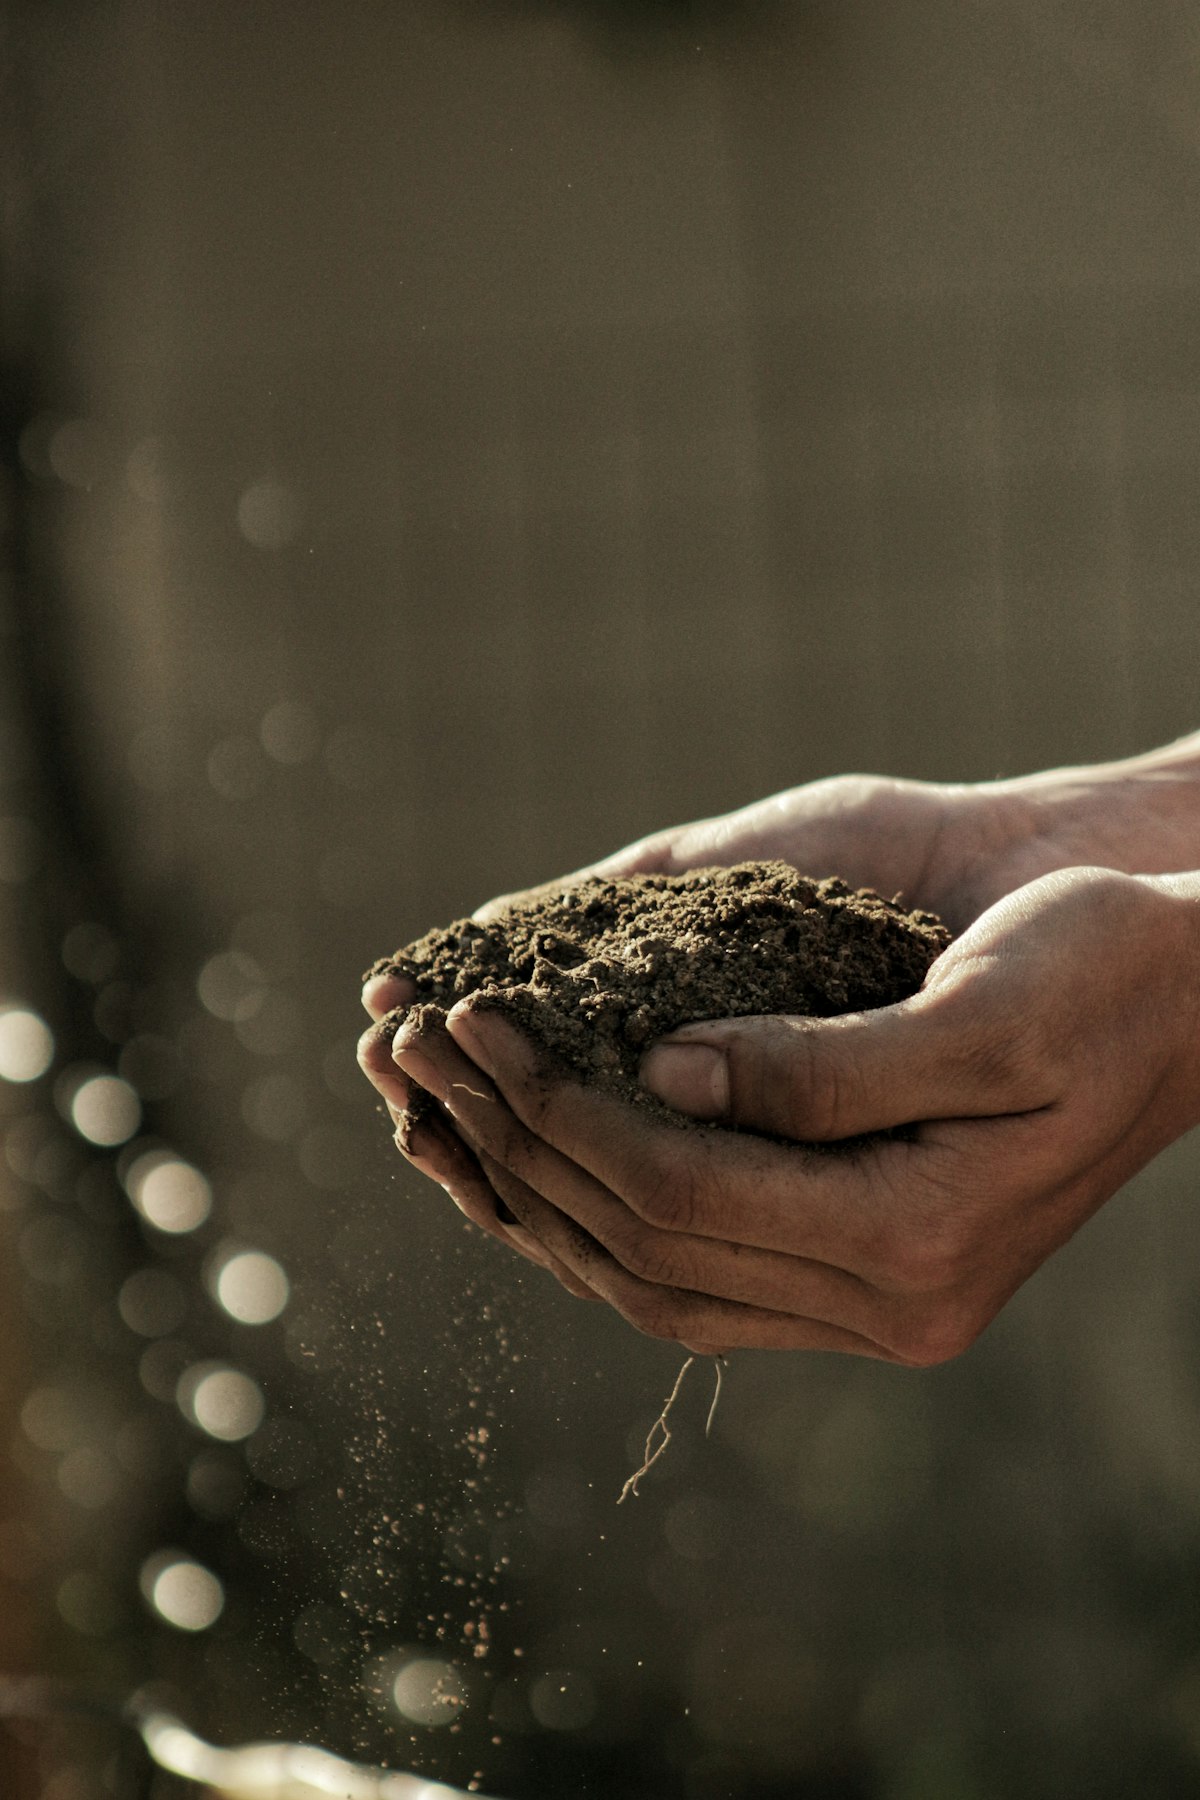
The Living Soil: Understanding the Soil Food Web
Healthy soil is alive. A single teaspoon of good garden soil contains billions of bacteria, miles of fungal threads, thousands of protozoa, and dozens of nematodes. These organisms form the soil food web—an interconnected system that cycles nutrients, builds soil structure, and protects plants from disease.
Key Players in Soil Biology
Bacteria: The most numerous soil organisms, bacteria decompose organic matter and convert nutrients into plant-available forms. Some bacteria fix atmospheric nitrogen; others form partnerships with plant roots.
Fungi: Fungal threads (hyphae) extend far beyond roots, accessing water and nutrients plants couldn’t reach alone. Mycorrhizal fungi form direct connections with plant roots, trading minerals for sugars. Decomposer fungi break down tough materials like wood chips and dead roots.
Protozoa: Single-celled organisms that prey on bacteria, releasing nutrients in plant-available forms. Protozoa-rich soils often grow better plants than protozoa-poor soils with identical nutrient levels.
Nematodes: Microscopic worms with varied roles—some eat bacteria, some eat fungi, some attack plant roots (pest nematodes), and some prey on pest nematodes. A diverse nematode community indicates healthy soil.
Earthworms: These visible soil engineers tunnel through soil, improving drainage and aeration while leaving nutrient-rich castings. Earthworm presence indicates good soil conditions; their activity accelerates as conditions improve.
Building Soil Biology
Chemical fertilizers feed plants directly but do little for soil organisms. Building the soil food web requires:
- Organic matter: Food for decomposers that form the base of the soil food web
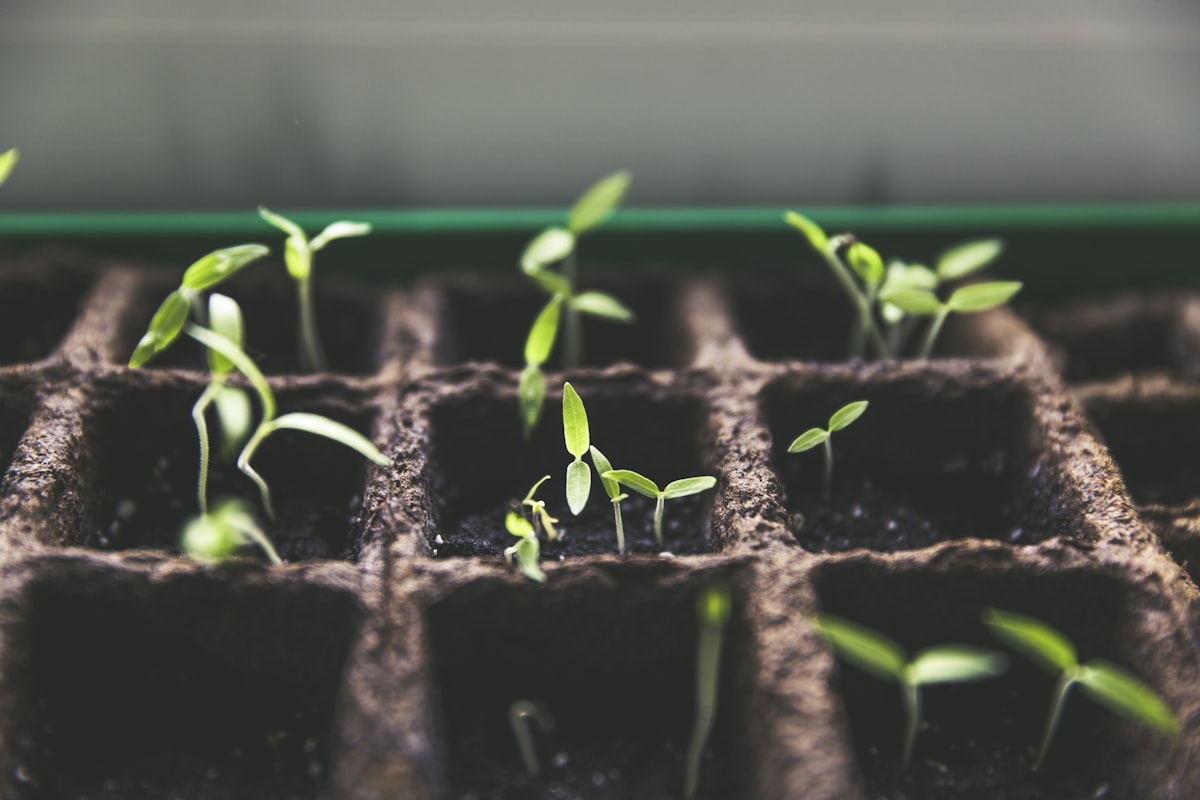
- Living roots: Plant roots exude sugars that feed bacteria and fungi in the rhizosphere (root zone)
- Minimal disturbance: Tilling disrupts fungal networks and exposes organisms to drying and UV damage
- Avoiding toxins: Many pesticides and some fertilizers harm soil organisms
- Moisture management: Soil organisms need consistent moisture; mulch helps maintain it
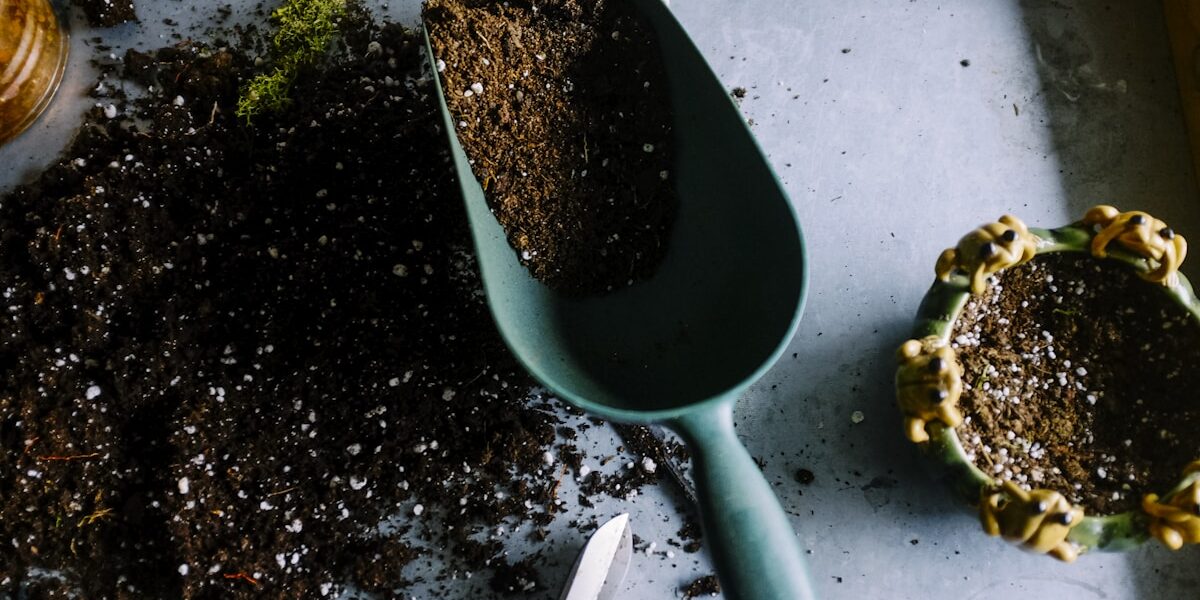
The Magic of Compost
Compost is the single most important amendment for Pacific Northwest gardens. It improves both clay and sandy soils, feeds beneficial soil organisms, and slowly releases nutrients throughout the growing season. Compost is the cornerstone of soil building.
How Compost Improves Soil
In clay soil, compost creates aggregates—clumps of soil particles bound by fungal threads and bacterial slime. These aggregates create air spaces and channels that improve drainage while maintaining the nutrient-holding capacity clay provides. Over time, well-composted clay becomes the prized “clay loam” that combines good drainage with excellent fertility.
In sandy soil, compost acts as a sponge, absorbing water and nutrients that would otherwise drain away. Humus—the stable end product of decomposition—binds to sand particles, creating a matrix that holds moisture while still draining freely.
How Much Compost to Add
For new garden beds, spread 4-6 inches of compost over the soil surface and work it into the top 8-12 inches. This may seem like a lot, but compost compresses and decomposes, incorporating into the soil more than you might expect.
Established gardens benefit from 1-2 inches of compost applied twice yearly—once in early spring before planting and again in fall after harvest. Fall application allows winter’s moisture to incorporate compost while feeding the soil food web during the slower season.
Types of Compost
Finished compost: Dark, crumbly, earthy-smelling material ready to work directly into planting beds. Good finished compost has no recognizable ingredients and doesn’t heat up when piled. Available bagged or in bulk from landscape suppliers.
Cedar Grove compost: Made locally from yard waste, this compost is widely available throughout the Puget Sound region. It varies somewhat by batch but generally provides good organic matter and moderate nutrients. Apply in fall to allow complete breakdown before spring planting.
Mushroom compost: A byproduct of commercial mushroom farming, this amendment adds organic matter and some nutrients but may be high in salts. Use sparingly—no more than 1 inch per application—and avoid for salt-sensitive plants like beans.
Homemade compost: The gold standard for gardeners. Kitchen scraps and yard waste transformed into rich soil amendment provide nutrients, beneficial microbes, and the satisfaction of closing the loop on organic waste. Takes 3-12 months depending on method and attention.
Compost from animal sources: Composted manure from herbivores (horse, cow, chicken, rabbit) adds nitrogen along with organic matter. Always use fully composted manure—fresh manure can burn plants and may contain weed seeds. Age manure at least 6 months before use, or hot-compost it to kill seeds and pathogens.
Making Your Own Compost in the Pacific Northwest
Our climate is ideal for composting. Moderate temperatures and consistent moisture (at least in winter) keep decomposition active year-round. Key practices for Pacific Northwest composting:
- Balance greens and browns: Mix nitrogen-rich materials (food scraps, grass clippings) with carbon-rich materials (dried leaves, straw) in roughly equal volumes
- Cover in winter: Keep rain from saturating the pile and driving out oxygen. A tarp or bin lid maintains moisture without waterlogging
- Turn periodically: Introducing air speeds decomposition and prevents anaerobic conditions that cause odors
- Chop large materials: Smaller pieces decompose faster. Shred leaves, cut up vegetable scraps, and break down stalks
- Be patient: Cold-weather composting slows in winter but continues. A pile started in fall may be ready by late spring
Essential Soil Amendments
Lime for Acidic Soil
Pacific Northwest rainfall naturally acidifies soil as hydrogen ions displace calcium and magnesium. Most vegetables prefer pH 6.0-7.0, but our soils often test below 6.0. Lime neutralizes acidity and provides calcium.
Types of lime:
- Dolomitic lime: Contains both calcium and magnesium. Best for most Pacific Northwest soils, which often need both nutrients. Apply based on soil test recommendations.
- Calcitic lime: Provides calcium without magnesium. Use when soil tests show adequate magnesium.
- Agricultural lime: Ground limestone with varying fineness. Finer particles act faster; coarser particles last longer.
Application: Apply lime in fall, allowing several months for soil chemistry to adjust before spring planting. Work into the top 6-8 inches or apply to surface and let rain incorporate it. Retest after two years and reapply as needed.
Gypsum for Clay Improvement
Gypsum (calcium sulfate) improves clay soil structure without affecting pH. Calcium ions replace sodium in clay particles, causing them to clump together (flocculate) and improving drainage. Gypsum is particularly valuable in sodic soils where sodium has dispersed clay particles.
Apply 2-4 pounds per 100 square feet in fall. Work into the soil if practical, or apply to the surface and let rain incorporate it. Results develop over months as gypsum moves through the soil profile.
Sulfur for Alkaline Soil
Though uncommon in western Washington, some eastern Washington and drier Pacific Northwest soils are alkaline (pH above 7.0). Elemental sulfur acidifies soil as bacteria oxidize it to sulfuric acid. This process is slow—apply sulfur the year before planting and retest before adding more.
Bone Meal and Rock Phosphate
These slow-release phosphorus sources benefit root development and flowering. Only apply if soil tests show phosphorus deficiency—excess phosphorus can inhibit beneficial mycorrhizal fungi and pollute waterways. Bone meal releases faster than rock phosphate but both work slowly compared to synthetic fertilizers.
Greensand and Kelp Meal
These mineral-rich amendments provide trace elements and potassium. Greensand (glauconite) releases minerals very slowly over years. Kelp meal provides growth hormones and trace minerals along with potassium. Both support long-term soil health but won’t correct acute deficiencies.
Cover Crops: Living Soil Builders
Cover crops—plants grown specifically to improve soil rather than for harvest—are powerful tools for Pacific Northwest gardeners. Our mild winters allow cover crops to grow when vegetable beds would otherwise sit bare, preventing erosion and feeding the soil food web.
Cover Crop Benefits
- Nitrogen fixation: Legume cover crops (crimson clover, hairy vetch, Austrian winter peas) capture atmospheric nitrogen and store it in root nodules. When incorporated, this nitrogen becomes available to subsequent crops.
- Organic matter addition: Cover crop roots and foliage add organic matter when incorporated, feeding soil organisms and improving structure.
- Erosion prevention: Living roots hold soil in place during heavy winter rains. Bare soil erodes, losing topsoil and carrying nutrients into waterways.
- Weed suppression: Dense cover crop growth outcompetes weeds, reducing weed seed production and spring weed pressure.
- Soil biology support: Living roots feed soil organisms year-round. Diverse cover crop mixes support diverse soil communities.
- Compaction reduction: Some cover crops (daikon radish, forage turnips) have deep taproots that penetrate compacted layers, creating channels for water and subsequent roots.
Common Pacific Northwest Cover Crops
Crimson clover: A nitrogen-fixing legume with beautiful red flowers. Plant in September for spring incorporation. Fixes 70-150 pounds of nitrogen per acre when grown to full flower. Winter-hardy in most of western Washington.
Austrian winter peas: Fast-growing legume that tolerates cold well. Plant September through October for spring incorporation. Provides moderate nitrogen and substantial biomass.
Winter rye: A grass cover crop that produces large amounts of biomass and holds soil effectively. Very cold-hardy and allelopathic—suppress weeds but can inhibit subsequent crops if not properly managed. Incorporate at least two weeks before planting vegetables.
Hairy vetch: Nitrogen-fixing legume that overwinters and grows vigorously in spring. More cold-hardy than crimson clover. Plant in September for spring incorporation.
Fava beans: Dual-purpose legume—harvest beans for eating while still getting nitrogen fixation and biomass. Plant in October; harvest pods in spring and till remaining plant matter.
Cover crop mixes: Combining legumes with grasses maximizes benefits—grasses provide structure and weed suppression while legumes fix nitrogen. A common mix is crimson clover with winter rye at a 2:1 ratio.
Using Cover Crops
Planting: Broadcast seed over prepared beds after fall harvest, usually in September or October. Rake to cover seeds lightly and water if rain isn’t expected soon. Most cover crops establish easily with minimal preparation.
Incorporation: Terminate cover crops 2-3 weeks before planting vegetables. Cut or mow, then turn under with a fork or spade. Allow time for decomposition before planting—fresh cover crop residue can tie up nitrogen temporarily and physical debris can interfere with seeding.
No-till option: Rather than turning under, cut cover crops at soil level and leave as mulch. Plant through the mulch or move it aside for seeding. This approach preserves soil structure and fungal networks but may slow soil warming in spring.
Mulching for Soil Health
Mulch—material covering the soil surface—protects and feeds soil while suppressing weeds. In the Pacific Northwest, mulch serves different purposes across seasons.
Summer Mulching
During our dry summers, mulch conserves soil moisture, reducing watering needs and keeping roots cool. Apply 2-4 inches of organic mulch (straw, leaves, wood chips) after soil warms in late May. Keep mulch away from plant stems to prevent rot.
Winter Mulching
Winter mulch protects perennials and garlic from freeze-thaw cycles while preventing erosion. Apply after the first hard frost, once plants are dormant. Remove or rake aside in spring to allow soil warming.
Mulch Materials
Straw: Excellent vegetable garden mulch. Decomposes moderately, adding organic matter. Use seed-free straw to avoid introducing weeds. Apply 4-6 inches.
Leaves: Free and abundant in fall. Shred before applying—whole leaves mat and shed water. Leaf mulch decomposes fairly quickly, enriching soil with valuable organic matter.
Wood chips: Long-lasting mulch for perennial beds and paths. Fresh chips temporarily tie up nitrogen at the soil surface—avoid mixing into soil. Excellent for building soil fungal populations over time.
Compost: Provides nutrients while mulching. Best as a thin layer (1-2 inches) topped with coarser mulch. Doesn’t suppress weeds as effectively as deeper mulches.
Living mulch: Low-growing plants like white clover, planted between vegetable rows, provide mulch benefits while fixing nitrogen. Requires management to prevent competition with main crops.
Building Raised Beds with Great Soil
Raised beds allow gardeners to create optimal soil conditions regardless of native soil quality. When filling new raised beds, the opportunity to build perfect soil from scratch is valuable—don’t waste it on inferior materials.
The Ideal Raised Bed Mix
A proven formula for raised bed soil:
- 60% high-quality topsoil (screened, weed-free)
- 30% finished compost
- 10% perlite, pumice, or coarse sand (for drainage)
Avoid the temptation to use pure compost or potting mix in raised beds. Pure compost settles dramatically and may be too nutrient-rich initially. Potting mix is expensive and doesn’t provide the mineral content vegetables need long-term.
Sourcing Quality Soil
Buy in bulk from reputable landscape suppliers rather than bagged products when possible. Ask about source material, screening process, and whether the topsoil has been blended with organic matter. Quality varies significantly between suppliers—ask for references or visit their yard to inspect materials before ordering.
For small quantities, commercial raised bed mixes offer convenience, though they’re typically overpriced. Read ingredients carefully and avoid mixes heavy on bark or peat without mineral soil content.
Maintaining Raised Bed Soil
Raised bed soil requires ongoing attention:
- Add 1-2 inches of compost annually to replace what plants remove and decomposition consumes
- Top off beds as needed—soil level drops as organic matter decomposes
- Rotate crops to prevent nutrient depletion and disease buildup
- Cover with mulch or cover crops during fallow periods
No-Till and Low-Till Approaches
Traditional advice called for tilling soil annually to incorporate amendments and prepare for planting. Modern understanding of soil biology suggests minimizing disturbance to preserve fungal networks, earthworm tunnels, and soil structure.
Benefits of Reduced Tillage
- Preserved soil structure: Aggregates built by soil organisms remain intact, maintaining drainage and aeration
- Protected fungal networks: Mycorrhizal and other beneficial fungi extend through undisturbed soil, supporting plant growth
- Reduced weed germination: Tilling brings buried weed seeds to the surface where they germinate. Undisturbed soil keeps seeds dormant.
- Carbon preservation: Tilling exposes organic matter to oxygen, accelerating decomposition and releasing carbon dioxide. Undisturbed soil stores carbon.
- Less work: Eliminating annual tilling saves significant time and effort
Transitioning to No-Till
Most Pacific Northwest gardens can transition to no-till over 2-3 seasons:
- Year 1: Add 4-6 inches of compost to surface without tilling. Plant through the compost layer. Mulch heavily.
- Year 2: Continue surface applications of compost. Soil biology begins building structure and incorporating organic matter.
- Year 3: Soil should be soft enough to plant with minimal disturbance. Continue surface composting and mulching.
Some tillage may remain necessary: preparing new beds, incorporating lime, or managing cover crops. The goal is minimizing disturbance rather than eliminating it entirely.
Troubleshooting Soil Problems
Compaction
Signs: Hard soil surface, standing water, weak plant growth, shallow rooting
Causes: Walking on beds, working wet soil, heavy equipment, loss of organic matter
Solutions: Deep mulching, cover crops with strong roots (daikon radish, forage turnips), broadfork aeration, adding organic matter over time. Avoid the practices that caused compaction.
Poor Drainage
Signs: Water pooling after rain, soggy soil, root rot, struggling plants
Causes: Clay soil, compaction, high water table, low-lying location
Solutions: Raised beds (often the most practical solution), French drains, organic matter additions over multiple years, planting on mounds. Gypsum may help in clay soils.
Low Fertility
Signs: Yellow leaves, stunted growth, poor yields despite adequate water
Causes: Nutrient-poor native soil, heavy cropping without amendment, excessive leaching
Solutions: Soil test to identify specific deficiencies, compost additions, appropriate fertilizers, cover crops (especially nitrogen-fixing legumes), mulching to reduce nutrient loss.
High Acidity (Low pH)
Signs: Poor growth despite fertile-appearing soil, certain deficiency symptoms (phosphorus unavailability causes purple leaves)
Causes: Heavy rainfall leaching calcium, organic matter decomposition, certain amendments
Solutions: Lime application based on soil test, wood ash (sparingly), avoid acidifying fertilizers.
Building Soil: A Long-Term Investment
Soil improvement isn’t accomplished in a single season. Building truly great soil takes years of consistent attention—adding organic matter, growing cover crops, mulching, and minimizing disturbance. But the investment compounds: each year’s efforts build on previous years, creating soil that produces better and requires less supplemental feeding.
Start where you are with what you have. Even small improvements—a single cover crop, consistent mulching, annual compost—begin the process. The soil organisms you feed this year will multiply and thrive, creating conditions that support even more life next year. In time, you’ll have soil that grows vegetables easily, shrugs off pest and disease pressure, and rewards your attention with abundant harvests.
There is no shortcut to great soil, but there is also no limit to how good your soil can become. Every bag of leaves you spread, every cover crop you plant, every bucket of compost you apply contributes to a living system that will feed your garden for decades to come.