
How to Grow Sweet Potatoes
Sweet potato growing has gotten complicated with all the conflicting advice flying around. As someone who’s spent years digging them up from backyard beds and figuring out what actually matters, I learned everything there is to know about growing sweet potatoes successfully. Today, I’ll share it all with you.

That’s what makes sweet potatoes endearing to us gardeners — they’re generous plants that reward basic competence. You don’t need perfect soil or ideal weather. You just need to understand a few things that actually matter.
Selecting the Right Variety
First, pick a variety that suits where you live. Beauregard is the go-to for most home gardeners — it yields well and handles a range of conditions without complaint. Jewel gives you sweet, moist flesh that’s excellent for baking. Garnet has a rich, deep orange color that looks great on the plate. I’ve grown Beauregard for years and it’s consistently the easiest to work with.
Preparing the Soil
Sweet potatoes prefer sandy, well-drained soil with a pH between 5.8 and 6.2. Loamy soil works fine too. The main thing to avoid is compacted, heavy clay — the tubers can’t size up properly. Clear the bed of weeds, till to about 12 inches deep, and work in some compost if you have it. Probably should have mentioned this earlier, but loose soil is the single biggest factor in getting decent-sized tubers.
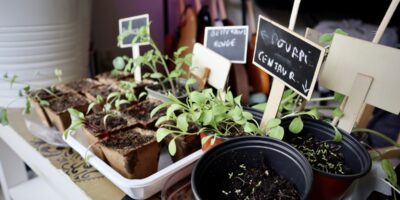
Starting with Slips
Sweet potatoes grow from slips, which are sprouts from mature tubers. You can buy them from garden centers or grow your own. To make your own, cut a sweet potato in half and set it in water with half the tuber submerged. In about a month, sprouts appear. Once they hit 6 inches, they’re ready to plant. It’s genuinely satisfying watching them develop — probably more satisfying than it should be, honestly.
Planting the Slips
Wait until your soil warms to at least 60°F — sweet potatoes sulk in cold ground and never really recover. Space slips 12 to 18 inches apart in rows 36 to 48 inches apart. Plant them deep enough to cover the roots and about half an inch of stem, then water immediately. The first week after transplanting is the most critical.
Watering Requirements
Sweet potatoes need consistent moisture but don’t want to sit in wet soil. About an inch of water per week is the target. During dry spells, check the soil a few inches down — if it’s dry there, water. Mulching around the plants helps retain moisture and cuts down on weeding significantly.
Fertilizing
I’m apparently someone who over-fertilized on the first attempt, and a nitrogen-heavy approach works for lush vines while a lower-nitrogen formula never produces the tuber yields I want. Once tubers start forming, back off the nitrogen — too much leafy growth at that stage comes at the expense of the tubers you’re actually after. A balanced fertilizer every 4 to 6 weeks is the right rhythm.
Pest and Disease Management
Frustrated by sweet potato weevil damage on a perfectly good crop, I started inspecting plants weekly. That new habit took hold and eventually evolved into the basic monitoring routine home growers swear by today. Aphids and wireworms are the other main culprits. Crop rotation helps prevent soil-borne diseases like root rot, and removing infected plants immediately stops problems from spreading.
Harvesting
Sweet potatoes are usually ready 90 to 120 days after planting. When the foliage starts yellowing, that’s your cue. Dig carefully with a garden fork — bruised tubers spoil quickly. Let them cure in a warm, humid spot for about 10 days. This step genuinely matters for flavor and shelf life, so don’t skip it.
Storing Sweet Potatoes
After curing, sweet potatoes store well for several months. Keep them in a cool, dark spot with decent airflow — around 55°F to 60°F is ideal. Don’t refrigerate them. Cold temperatures turn the flesh hard and alter the taste in a way that doesn’t improve with cooking.
Tips for Success
- Choose disease-resistant varieties to minimize issues.
- Practice crop rotation to maintain soil health.
- Inspect for pests regularly and act promptly when you find them.
- Consistent watering matters most during dry spells.
- Mulch the bed to retain moisture and suppress weeds.
Growing sweet potatoes is one of the more rewarding vegetable garden experiences. The harvest is satisfying in a way that’s hard to explain until you’ve done it — you’re pulling something substantial out of the ground that you grew from a small sprout. With these steps, you’ll have a solid harvest and a clear sense of what to adjust next season.


Stay in the loop
Get the latest wildlife research and conservation news delivered to your inbox.