Growing tulips in containers has gotten complicated with all the varieties and methods floating around. As someone who’s forced tulip bulbs in pots for years now, I learned everything there is to know about getting beautiful blooms from potted bulbs. Today, I will share it all with you.
Planting tulips in pots is genuinely rewarding — brings color to balconies, patios, and indoor spaces. If you have limited outdoor space or want tulips inside your home, container growing is the way to go.
Choosing the Right Bulbs
Not all tulips grow well in pots. Look for dwarf or smaller varieties. Species tulips like Tulipa tarda or Tulipa humilis are excellent choices — naturally smaller and can thrive in contained space.
That’s what makes species tulips endearing to us container gardeners — they’re built for these conditions rather than adapted to them.
Picking the Pot
Drainage is crucial. Water pooling causes bulb rot, which destroys your entire planting. Look for pots with drainage holes at the bottom. Ensure at least 8 to 12 inches of depth for root growth.
Terra cotta works well, but any material with proper drainage suffices. I’ve used plastic, ceramic, and even wooden boxes with success.
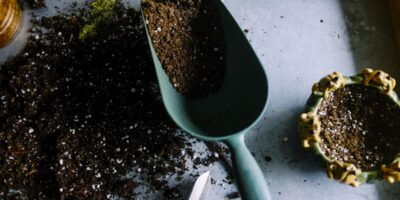
Preparing the Soil
Use a high-quality potting mix. Tulips need well-draining soil to thrive. A mix labeled for bulbs or containers is ideal. Mix in some grit or perlite to increase drainage further.
Avoid heavy garden soil — it compacts in pots and holds too much moisture.
Planting Process
Probably should have led with this section, honestly. Here’s the actual process:
- Fill the pot with soil, leaving a few inches at the top for bulbs and watering space.
- Place tulip bulbs pointy end up. Arrange them closely but not touching to maximize display.
- Cover with soil. The top of each bulb should sit about two to three times its height in depth.
- Water lightly. This begins the rooting process.
The Cold Period
After planting, pots need a cool location. Tulip bulbs require cold exposure to bloom — it’s non-negotiable. An unheated garage or shed works well. The area should stay above freezing but remain cold, around 35-50°F (2-10°C).
This mimics winter conditions that tulips experience in the ground. Skip this step and you’ll get leaves but no flowers.
Winter Monitoring
Check pots periodically during winter. Soil should stay slightly moist but not wet. Water lightly if they dry out completely. Good air circulation prevents mold and rot.
Bringing Them Inside
About one month before you want blooms, move pots to a warmer area. A cool room indoors works best — around 60°F (15°C). This simulates early spring and encourages growth.
Don’t go straight to warm temperatures. The shock can abort flower development.
Light and Growth
Tulips need sunlight once shoots appear. Place them near a window with bright, indirect light. Direct sunlight can be too intense initially, especially for tender new growth.
As flowers develop, you can move them to brighter spots.
Watering as They Grow
Water regularly when shoots appear. Keep soil moist but not waterlogged. As flowers develop, water needs increase slightly. Monitor and adjust based on how quickly soil dries.
About Fertilizing
Supplementary feeding is generally unnecessary. Bulbs contain all the nutrients needed for one flowering cycle. Over-fertilization can actually harm plants, so don’t bother unless you’re keeping bulbs for future years.
Enjoying Your Blooms
Once flowering, move pots wherever you want to enjoy them. Tulips typically last a week to two depending on variety and room temperature. Cooler spots extend flower life significantly.
After the Show
After blooming finishes, foliage continues growing. Let leaves die back naturally — this process replenishes the bulb for next year. Remove dead foliage once it yellows completely.
You can store bulbs for replanting or just start fresh with new bulbs each year. Most gardeners find new bulbs easier than storing, but both approaches work.


Stay in the loop
Get the latest wildlife research and conservation news delivered to your inbox.