
Welcome to Pacific Northwest Gardening
The Pacific Northwest offers some of the best gardening conditions in North America. With mild winters, abundant rainfall during fall and winter, and rich volcanic soil, Seattle-area gardeners can grow an incredible variety of vegetables, fruits, and ornamentals. However, our unique maritime climate also presents challenges that gardeners from other regions might not expect.
This comprehensive guide covers everything beginners need to know to start a successful garden in the Pacific Northwest. Whether you’re planting your first tomato or planning a full vegetable plot, you’ll find detailed guidance on every aspect of gardening in our unique climate zone.

Understanding the Pacific Northwest Climate
Most of the Seattle metropolitan area falls within USDA Hardiness Zone 8b, with temperatures rarely dropping below 15-20°F in winter. This mild climate allows for year-round gardening, something that sets us apart from most of the country. But understanding the nuances of our maritime climate is essential for gardening success.
The Dry Summer Challenge
Despite our reputation for rain, the Pacific Northwest experiences remarkably dry summers. From late June through September, Seattle typically receives less rainfall than Phoenix, Arizona. During this period, the region may go 6-8 weeks without significant precipitation. This means irrigation becomes essential during the growing season, and choosing drought-tolerant varieties or implementing efficient watering systems is crucial for plant survival.
The transition from wet spring to dry summer happens quickly, usually in late June. New gardeners often find themselves caught off guard when their well-watered spring garden suddenly starts wilting. Planning for summer irrigation from the beginning saves plants and prevents stress-related problems like blossom end rot in tomatoes.
Cool Nights and Late Springs
Our nights stay cool even in summer, with temperatures often dropping into the 50s. While comfortable for sleeping, these cool nights slow the growth of heat-loving crops like tomatoes, peppers, eggplant, and melons. These warm-season vegetables thrive when night temperatures stay above 60°F—a threshold our region rarely maintains consistently.
Our last frost date is typically around April 15th, but soil temperatures remain cool well into May. While air temperature might feel warm enough for planting, soil temperature tells the true story. Tomatoes won’t thrive in soil below 60°F, and beans may rot rather than germinate in cold, wet soil. Patient gardeners who wait for proper soil temperatures achieve better results than those who rush to plant.
Extended Growing Season
On the positive side, our mild fall weather extends the growing season deep into October and November—sometimes even December in mild years. Cool-weather crops like kale, Brussels sprouts, leeks, and chard actually improve with light frosts. The cold triggers these plants to convert starches to sugars, resulting in sweeter, more tender produce.
Many Pacific Northwest gardeners maintain productive gardens nearly year-round with proper planning. While the shortest days of December and January slow growth considerably, hardy greens planted in fall will overwinter and resume growth as days lengthen in February. This potential for year-round production is one of our region’s greatest gardening advantages.
Marine Influence and Microclimates
The Pacific Northwest’s proximity to Puget Sound and the Pacific Ocean creates significant variations in growing conditions over short distances. Gardens near the water experience more moderate temperatures—cooler in summer and warmer in winter—than those just a few miles inland. South-facing slopes warm earlier in spring, while north-facing locations may stay cool well into June.
Understanding your specific microclimate helps with plant selection and timing. A garden in a protected south-facing corner might successfully ripen varieties that fail in an exposed location just blocks away. Observing your specific conditions over a full year reveals opportunities you might otherwise miss.
Essential First Steps for New Gardeners
Choosing Your Garden Location
Most vegetables require at least 6-8 hours of direct sunlight daily. In the Pacific Northwest, south-facing locations are ideal because they maximize sun exposure during our shorter winter days and provide the warmth that summer crops need. When selecting your garden spot, consider these factors carefully:
- Assess sun exposure: Watch your potential garden area throughout the day, preferably at different times of year. Remember that sun angles change seasonally, and a spot that gets full sun in summer may be shaded in spring and fall by trees, buildings, or other structures. The winter sun sits much lower in the sky, casting longer shadows.
- Consider drainage: Pacific Northwest winters bring substantial rainfall—sometimes 6 inches or more per month. Avoid low spots where water collects, as soggy soil leads to root rot, fungal diseases, and poor plant development. If your only available space has drainage issues, raised beds become essential.
- Check for convenience: A garden close to your kitchen door gets more attention than one hidden in the back corner. You’ll water more consistently, notice pest problems earlier, weed more frequently, and harvest at peak ripeness if your garden is easily accessible. The best garden location combines good growing conditions with easy access.
- Evaluate wind exposure: Puget Sound winds can damage tall plants, dry out soil quickly, and stress young transplants. Consider natural windbreaks like fences, hedges, or buildings. Plan to stake tomatoes, peppers, and other tall crops regardless of wind exposure, but especially in windy locations.
- Check for root competition: Trees and large shrubs have extensive root systems that compete aggressively for water and nutrients. Keep vegetable gardens at least as far from trees as the branch canopy extends—and remember that roots often spread well beyond the canopy.
Understanding Pacific Northwest Soil
Soil conditions vary significantly across the region. Seattle neighborhoods often have clay-heavy soil that holds water and drains poorly, while areas east of Lake Washington tend toward sandier, faster-draining soil. Tacoma and south King County often have glacial till—rocky soil mixed with clay that presents its own challenges. Before investing time and money in your garden:
- Test your soil: King County offers affordable soil testing through the WSU Extension program. A basic test reveals your soil’s pH level (most vegetables prefer 6.0-7.0), nutrient levels, and organic matter content. This information helps you amend appropriately rather than guessing—over-fertilizing causes as many problems as under-fertilizing.
- Assess drainage: Dig a hole 12 inches deep, fill it with water, and see how long it takes to drain completely. If water remains after 24 hours, you’ll need to improve drainage with raised beds, amended soil, or French drains. Good drainage prevents the root rot and fungal diseases that plague soggy gardens.
- Add organic matter: Nearly all Pacific Northwest gardens benefit from generous additions of compost. Our heavy winter rains leach nutrients quickly, making organic matter essential for both fertility and soil structure. Plan to add 2-4 inches of compost annually—it’s nearly impossible to add too much.
- Check for contamination: Urban gardens, especially those near old houses, may contain lead from historic paint chips or automotive exhaust. If you’re gardening in an established urban area, soil testing for heavy metals provides peace of mind. Raised beds with imported soil offer a safe alternative if contamination is found.
Building and Improving Garden Soil
Healthy soil is the foundation of a productive garden. Unlike hydroponic or container systems where you can control every variable, in-ground gardening depends entirely on soil quality. Understanding how to build and maintain fertile soil will determine your gardening success more than any other single factor.
The Components of Healthy Soil
Good garden soil contains four essential components: mineral particles (sand, silt, and clay), organic matter, air spaces, and water. The balance between these components determines whether plants thrive or struggle.
Sandy soil drains quickly and warms fast in spring but doesn’t hold nutrients or water well. Clay soil holds nutrients and moisture but drains poorly and compacts easily. The ideal garden soil—loam—contains roughly equal parts sand, silt, and clay, creating a balance that holds nutrients while draining excess water.
Few gardeners start with perfect loam. The solution is adding organic matter, which improves both sandy and clay soils. In sandy soil, organic matter acts like a sponge, holding moisture and nutrients. In clay soil, it breaks up dense particles and improves drainage. You can’t change your soil’s mineral composition, but you can dramatically improve its structure and fertility with consistent organic matter additions.
Composting for Pacific Northwest Gardens
Composting transforms kitchen scraps, yard waste, and other organic materials into dark, crumbly humus that feeds plants and improves soil structure. In the Pacific Northwest, where our wet winters leach nutrients from the soil, maintaining a continuous supply of compost is essential for garden success.
What to Compost
Successful composting requires a balance of “green” nitrogen-rich materials and “brown” carbon-rich materials:
Green materials (nitrogen sources):
- Vegetable and fruit scraps
- Fresh grass clippings
- Coffee grounds and tea bags
- Fresh garden trimmings
- Seaweed and kelp
- Fresh manure from herbivores (chicken, rabbit, horse, cow)
Brown materials (carbon sources):
- Dried leaves
- Straw and hay
- Shredded cardboard and newspaper
- Wood chips and sawdust (use sparingly—they tie up nitrogen as they decompose)
- Dried garden waste
- Corn stalks and stems
Avoid composting:
- Meat, fish, and dairy products (attract pests)
- Diseased plant material (spreads pathogens)
- Weeds with mature seeds (may survive composting)
- Pet waste from dogs or cats (contains pathogens)
- Treated or painted wood
- Coal ash or charcoal
Composting Methods
Choose a composting method that fits your space, available materials, and desired timeline:
Hot composting produces finished compost in 1-3 months. Build a pile at least 3 cubic feet in size, maintain a 25:1 carbon-to-nitrogen ratio, and turn the pile weekly to introduce oxygen. Internal temperatures should reach 130-150°F, killing weed seeds and pathogens. This method requires more attention but produces results quickly.
Cold composting requires minimal effort but takes 6-12 months. Simply add materials as you generate them, keeping the pile loosely mixed. This method works well for gardeners who want compost without the work of hot composting. The downside: weed seeds and pathogens may survive.
Vermicomposting uses red wiggler worms to process food scraps quickly. A worm bin can operate indoors year-round, producing nutrient-rich castings (worm manure) and “compost tea” for houseplants and seedlings. Worm bins require regular attention but produce extremely high-quality compost.
In the Pacific Northwest, keep your compost pile covered during our wet winter months. Excessive moisture drives out oxygen, creating anaerobic conditions that slow decomposition and produce unpleasant odors. A tarp or compost bin lid keeps rain out while allowing air circulation.
Soil Amendments for Pacific Northwest Gardens
Beyond compost, several amendments address specific soil challenges common in our region:
Lime raises soil pH, which tends to drop in our acidic, rainy climate. Most vegetables prefer pH 6.0-7.0. If soil testing reveals acidic conditions (pH below 6.0), apply dolomitic lime in fall—it takes several months to affect pH. Dolomitic lime also provides calcium and magnesium, nutrients often deficient in Pacific Northwest soils.
Gypsum improves clay soil structure without affecting pH. It causes clay particles to clump together, improving drainage and aeration. Apply 2-4 pounds per 100 square feet in fall and work into the top 6 inches of soil.
Aged manure provides nitrogen and organic matter. Use manure from herbivores only—chicken, horse, cow, or rabbit. Always use aged manure (at least 6 months old) rather than fresh, which can burn plants and contain weed seeds. Aged manure has a crumbly, earthy texture and mild smell.
Cover crops build soil fertility while preventing erosion during our rainy winters. Plant crimson clover, winter rye, or Austrian winter peas in September. These crops add organic matter when tilled under in spring and—in the case of legumes—fix atmospheric nitrogen into plant-available form.
Planning Your First Garden
Start Small
The biggest mistake new gardeners make is planting too much too soon. A 4×8 foot raised bed produces more food than most beginners can keep up with, especially during summer’s abundance. Starting small allows you to learn without becoming overwhelmed, and success builds confidence for expansion.
Consider what you actually eat. Growing bushels of zucchini makes no sense if your family doesn’t enjoy it. Focus on vegetables you buy regularly, especially expensive or hard-to-find items where homegrown quality really stands out. Fresh-picked lettuce, vine-ripened tomatoes, and just-harvested peas bear no resemblance to their supermarket counterparts.
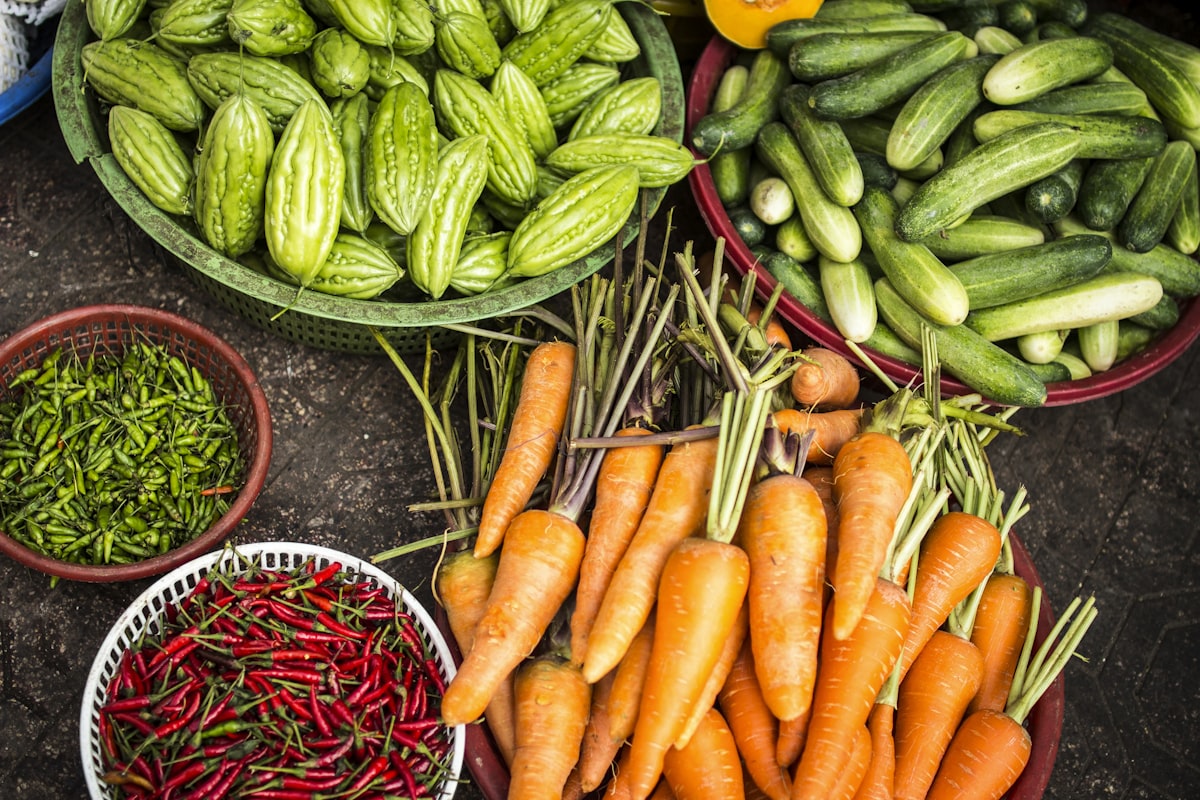
Best Vegetables for Pacific Northwest Beginners
These crops thrive in our maritime climate and forgive beginner mistakes:

Cool-Season Crops (Spring and Fall)
- Salad greens: Lettuce, spinach, arugula, and mesclun mixes grow quickly and tolerate our cool springs and falls. They bolt (go to seed) less readily here than in hotter climates, extending the harvest season. Sow seeds directly in the garden every 2-3 weeks for continuous harvest.
- Kale and chard: These nutrient-dense greens grow year-round in the Pacific Northwest. A fall planting often survives winter and produces well into the following summer. Lacinato (dinosaur) kale and Red Russian are particularly suited to our climate.
- Peas: Our cool, moist springs create ideal conditions for peas. Plant sugar snap peas or shelling peas in February or March for a May-June harvest. Peas fix nitrogen, improving soil for subsequent crops.
- Broccoli and cabbage family: These cool-weather crops prefer temperatures between 60-70°F—our spring and fall normal. Start transplants indoors or buy starts, as direct-seeded brassicas struggle with our slug population.
- Root vegetables: Carrots, beets, turnips, and radishes all perform well in our climate. Radishes mature in just 25-30 days; carrots need 70-80 days. Plant in spring for early summer harvest, then again in late summer for fall harvest.
Warm-Season Crops (Summer)
- Bush beans: More reliable than pole beans for beginners, bush beans produce heavily in our climate. Direct sow in late May when soil warms to 60°F. Multiple sowings every 2-3 weeks extend the harvest. Provider and Blue Lake are proven performers.
- Zucchini and summer squash: Nearly foolproof producers once summer arrives. One or two plants provide abundant harvests—sometimes too abundant! Check plants daily once they start producing, as squash grow remarkably fast.
- Potatoes: A Pacific Northwest tradition, potatoes grow well in our cool soil. Plant in March or April for summer harvest. New gardeners find potatoes satisfying because yields are visible and substantial—a single seed potato can produce several pounds.
- Cucumbers: With adequate heat and water, cucumbers produce prolifically in Pacific Northwest summers. Choose short-season varieties and wait until soil warms before planting. Provide consistent moisture—irregular watering causes bitter cucumbers.
Year-Round Crops
- Garlic: Plant in October for harvest the following July. Garlic practically grows itself in our climate, requiring minimal attention beyond weeding. Choose hardneck varieties for our climate—they produce larger cloves and edible scapes.
- Leeks: Transplant leeks in spring for fall and winter harvest. They tolerate our wet winters beautifully and improve with frost. Leeks provide a harvest when little else is available.
- Parsley: This biennial herb overwinters in the Pacific Northwest, providing fresh leaves nearly year-round. Plant Italian flat-leaf parsley for cooking, curly parsley for garnishing.
Crops That Need Extra Care in Our Climate
These popular vegetables require additional attention in the Pacific Northwest but reward the effort:
- Tomatoes: Our cool nights slow ripening, and late blight often strikes in fall. Choose early-maturing varieties (under 70 days), use black plastic mulch to warm soil, and consider wall-of-water protectors for early transplanting. Stupice, Early Girl, and Sungold are reliable choices. Grow tomatoes against a south-facing wall if possible.
- Peppers: Even more heat-demanding than tomatoes, peppers benefit from greenhouse starts, black plastic mulch, and the warmest location in your garden. Choose shorter-season varieties: Jimmy Nardello, Shishito, and Carmen mature faster than bell peppers.
- Corn: Requires consistent heat that our climate doesn’t always provide, plus block planting for wind pollination. Choose short-season varieties (70 days or less) like Earlivee or Trinity. Plant in blocks of at least 4 rows for proper pollination.
- Melons: Challenging but possible with black plastic mulch, row covers, and early-maturing varieties. Minnesota Midget cantaloupe and Sugar Baby watermelon have the best chance of ripening before fall rains arrive.
- Eggplant: Needs even more heat than peppers. Japanese varieties like Ichiban mature faster than Italian varieties. Start with transplants, use black plastic, and provide the warmest spot available.
Raised Beds: A Pacific Northwest Essential
While you can grow vegetables in amended in-ground soil, raised beds offer significant advantages in our climate. They warm earlier in spring, drain better during our wet winters, and allow you to create perfect soil conditions regardless of what lies beneath. For many Pacific Northwest gardeners, raised beds transform gardening from challenging to enjoyable.
Benefits of Raised Beds
- Improved drainage: Elevating the soil surface gets roots above soggy conditions during our wet months. Even 6 inches of elevation makes a significant difference.
- Earlier planting: Raised beds warm faster in spring because the soil is elevated and exposed to more sun. This can advance your planting schedule by 2-3 weeks—a significant advantage in our short growing season.
- Better soil: You control exactly what goes into raised beds, creating ideal growing conditions regardless of native soil. This is especially valuable in urban areas with contaminated or compacted soil.
- Reduced compaction: When beds are sized so you can reach the center from the edges, you never walk on growing soil. This maintains soil structure and aeration.
- Easier maintenance: The defined edges make weeding, watering, and harvesting more efficient. The slight elevation reduces back strain during gardening tasks.
- Pest barriers: Raised beds can be fitted with copper tape to deter slugs, hardware cloth to exclude moles and voles, or row covers for insect protection.
Building Raised Beds
Raised beds can be as simple as mounded soil or as elaborate as cedar frames with built-in irrigation. For most gardeners, a 4-foot-wide bed of any convenient length works well—you can reach 2 feet from each side without stepping on the soil.
Materials:
- Untreated cedar or redwood: Naturally rot-resistant and lasts 10-15 years. More expensive initially but worth the investment for permanent beds.
- Douglas fir: Less expensive than cedar but lasts only 5-7 years in our wet climate. A reasonable choice for temporary or experimental beds.
- Galvanized steel: Modern corrugated steel beds are attractive, durable, and won’t rot. They conduct heat, warming soil faster in spring—an advantage in our cool climate.
- Concrete blocks: Inexpensive and long-lasting, though less attractive. The hollow cores can be filled with soil for planting herbs.
- Avoid: Pressure-treated lumber (contains chemicals that may leach into soil), railroad ties (contain creosote), and painted wood (paint contains heavy metals in older products).
Dimensions:
- Width: 4 feet maximum (allows reaching center from either side)
- Length: Any length that fits your space—8-12 feet is common
- Depth: 8-12 inches minimum; 18-24 inches allows root crops and reduces bending
Filling Raised Beds
Quality soil makes or breaks a raised bed garden. Don’t fill beds with native soil dug from elsewhere—you’ll just transfer problems. Instead, create an optimal growing medium:
Basic mix:
- 60% high-quality topsoil (screened, weed-free)
- 30% compost (well-aged, from a reputable source)
- 10% perlite, pumice, or coarse sand (improves drainage)
For deeper beds, you can fill the bottom 6 inches with less expensive material like wood chips, straw, or leaves. This organic material will decompose over time, requiring top-ups with soil mix. Some gardeners use the “lasagna method,” layering brown and green materials like a compost pile. This works well but requires a year for materials to decompose before planting.
Container Gardening in the Pacific Northwest
Limited space doesn’t mean limited gardening. Containers allow apartment dwellers, renters, and those with poor soil to grow vegetables, herbs, and flowers successfully. The Pacific Northwest climate is actually well-suited to container gardening—our mild temperatures prevent the overheating that kills potted plants in hotter regions.
Choosing Containers
Almost anything that holds soil and has drainage holes can become a container garden. However, some choices work better than others:
- Size matters: Bigger is almost always better. Small containers dry out quickly and limit root development. Use at least 5-gallon containers for tomatoes and peppers, 3 gallons for chard and lettuce, and 1 gallon for herbs.
- Drainage is essential: Every container needs drainage holes. If your chosen container lacks them, drill holes in the bottom before planting.
- Material considerations: Terra cotta looks beautiful but dries out quickly. Plastic retains moisture better but may degrade in sunlight. Glazed ceramic offers the best of both worlds but is expensive and heavy. Fabric grow bags have become popular for their excellent drainage and air pruning of roots.
Container Soil
Never use garden soil in containers—it compacts, drains poorly, and may contain pests and diseases. Use a quality potting mix designed for containers. Look for mixes containing peat moss or coir, perlite or vermiculite, and composted bark. Some gardeners make their own:
DIY potting mix:
- 1 part peat moss or coir
- 1 part perlite or vermiculite
- 1 part compost
- Slow-release fertilizer per package directions
Watering Containers
Container plants require much more frequent watering than in-ground gardens. Potted plants may need daily watering in summer—sometimes twice daily during hot spells. Check moisture by inserting a finger an inch into the soil; if it feels dry, water thoroughly until water flows from drainage holes.
Self-watering containers with built-in reservoirs reduce watering frequency and provide more consistent moisture. For vacations or forgetful gardeners, these systems can be garden-savers.
Best Crops for Containers
- Herbs: Basil, parsley, cilantro, mint, rosemary, thyme, and oregano all thrive in containers. Keep mint in its own container—it spreads aggressively and will overwhelm companions.
- Salad greens: Lettuce, spinach, and arugula grow quickly in shallow containers. A 10-inch pot can provide weeks of cut-and-come-again salads.
- Tomatoes: Use determinate (bush) varieties in 5-gallon or larger containers. Patio, Tumbling Tom, and Bush Early Girl are bred for container growing.
- Peppers: Most pepper varieties adapt well to containers. A single plant in a 3-5 gallon container produces plenty for fresh eating.
- Beans: Bush beans perform well in containers; pole beans need substantial supports. A 5-gallon container supports 4-5 bush bean plants.
- Chard and kale: Ornamental and productive, these greens look beautiful in containers and provide harvests for months.
The Pacific Northwest Planting Calendar
Timing is everything in gardening. The following detailed calendar provides month-by-month guidance for Seattle and similar Zone 8b locations. Gardeners in colder or warmer areas should adjust timing accordingly.
January
The garden rests, but gardeners plan. This is the month for seed catalogs, garden planning, and maintenance tasks.
- Order seeds early—popular varieties sell out quickly
- Review last year’s notes and plan improvements
- Service and sharpen tools
- Turn compost pile if accessible
- Check stored vegetables and discard any showing spoilage
- Prune fruit trees during dormancy (but wait for roses)
- Force bulbs indoors for early bloom
February
The gardening season begins, though it doesn’t feel like it. Days lengthen noticeably, triggering both plant and gardener activity.
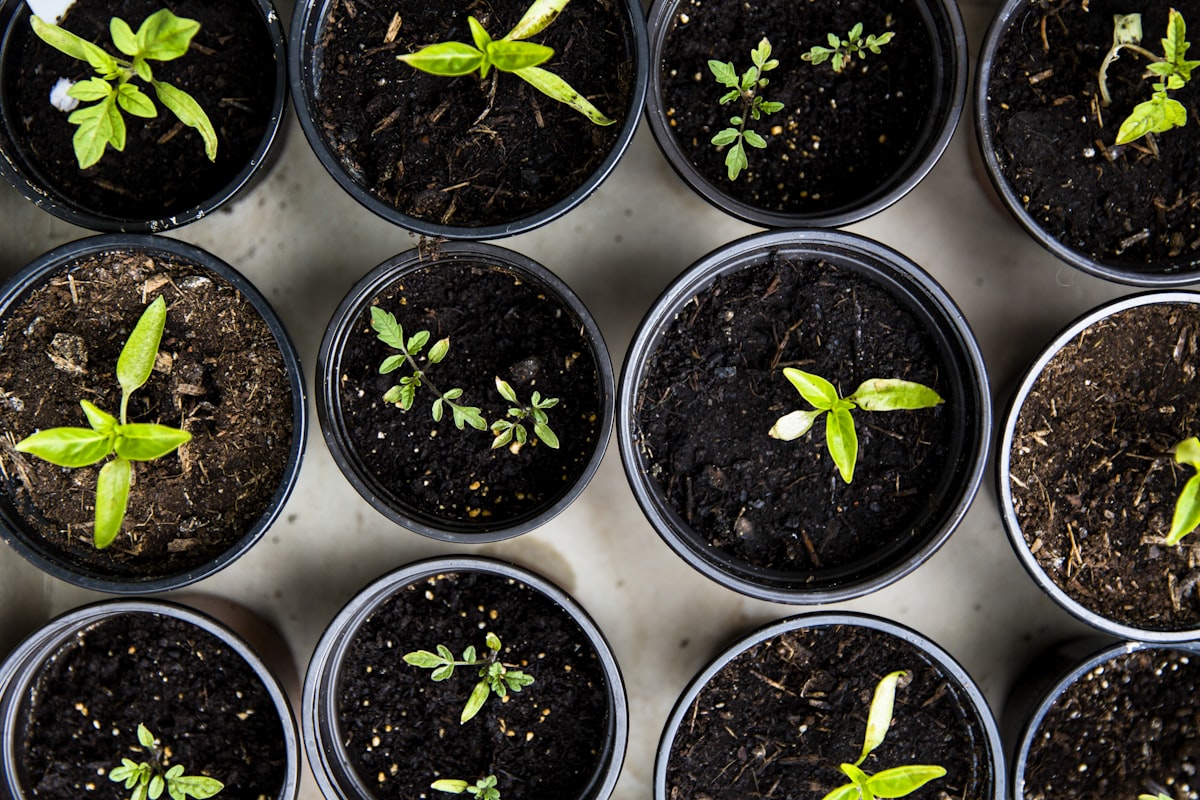
- Start tomato and pepper seeds indoors 6-8 weeks before last frost
- Direct sow peas and fava beans outdoors as soon as soil can be worked
- Plant bare-root fruit trees, roses, and berry bushes
- Start cool-season transplants indoors: broccoli, cabbage, cauliflower
- Spread compost on beds as weather permits
- Prune summer-flowering shrubs before new growth begins
- Divide perennials while dormant
March
Spring arrives, and outdoor planting accelerates. Weather remains unpredictable—be ready to protect new plantings from late frosts.
- Direct sow spinach, lettuce, radishes, and arugula
- Plant potatoes as soon as soil dries enough to work (St. Patrick’s Day is traditional)
- Continue starting warm-season crops indoors
- Transplant cool-season starts outdoors: broccoli, cabbage, kale
- Plant onion sets and shallots
- Apply lime if soil test indicated acidic conditions
- Begin slug control measures
- Plant asparagus crowns
April
Last frost typically occurs around April 15th, but soil remains cool. Focus on cool-season crops and hardening off warm-season starts.
- Continue direct sowing cool-season crops: carrots, beets, chard, more lettuce
- Transplant tomato and pepper starts into larger pots indoors
- Begin hardening off warm-season transplants: expose to outdoor conditions gradually over 7-10 days
- Plant more potatoes for succession harvest
- Direct sow parsnips (they need months to mature)
- Prepare beds for warm-season crops: lay black plastic to warm soil
- Set up irrigation systems before the dry season
May
The transition month. Cool-season crops peak while warm-season planting begins as soil warms.
- After May 15th, transplant tomatoes, peppers, eggplant when soil reaches 60°F
- Direct sow beans, corn, cucumber, squash, and melons in late May
- Set out basil after all frost danger passes
- Succession plant lettuce and salad greens in shaded areas to extend harvest
- Harvest asparagus, rhubarb, and early peas
- Install supports for tomatoes, beans, and cucumbers
- Begin regular watering as dry season approaches
- Plant out remaining warm-season crops
June
Summer gardening begins in earnest. The dry season starts—establish consistent watering routines.
- Water deeply and less frequently to encourage deep root growth
- Apply mulch around plants to conserve moisture
- Side-dress heavy feeders with compost or balanced fertilizer
- Succession plant beans and summer squash
- Harvest garlic scapes from hardneck varieties
- Begin harvesting early vegetables: peas, lettuce, radishes
- Monitor for pests: aphids, cucumber beetles, squash vine borers
- Pinch tomato suckers for larger fruit (or leave some for more, smaller fruit)
July
Peak summer production. Harvests accelerate, and attention shifts to keeping plants productive.
- Harvest garlic when leaves are half yellow/half green
- Continue succession planting beans and summer squash
- Plant fall brassicas (broccoli, cabbage, Brussels sprouts) in early July
- Start fall lettuce indoors where it’s cooler
- Keep up with zucchini harvest—check plants daily
- Begin canning, freezing, and preserving surplus
- Water consistently—irregular watering causes blossom end rot in tomatoes
- Top tomato plants in late July to redirect energy to ripening fruit
August
Transition month for fall gardening. Continue summer harvests while planting for fall and winter.
- Plant fall and winter crops: kale, chard, lettuce, spinach, Asian greens
- Sow cover crops in spent beds: crimson clover, winter rye
- Direct sow carrots and beets for fall harvest
- Transplant fall brassicas to their permanent positions
- Continue harvesting summer crops
- Watch for late blight on tomatoes—remove affected foliage immediately
- Order garlic for October planting
- Save seeds from open-pollinated favorites
September
Fall gardening accelerates. Days shorten rapidly, making timely planting essential for fall crops to establish before winter.
- Last chance to plant overwintering greens: spinach, mache, lettuce
- Sow overwintering onions in late September
- Harvest remaining warm-season crops before first frost
- Cure and store winter squash, potatoes, and onions
- Clean up spent plants to reduce pest and disease pressure
- Sow cover crops in all empty beds
- Begin compost pile cleanup and preparation
- Prepare beds for garlic planting
October
Plant garlic and prepare the garden for winter. Continue harvesting cold-tolerant crops.
- Plant garlic cloves 2 inches deep, 6 inches apart
- Harvest Brussels sprouts after first frost (frost improves flavor)
- Continue harvesting kale, chard, leeks, and root vegetables
- Rake and compost fallen leaves
- Apply final layer of compost to all beds
- Protect tender perennials with mulch
- Plant cover crops if not already done
- Clean and store tomato cages and stakes
November
The garden winds down but doesn’t stop. Hardy crops continue producing; planting season ends.
- Harvest winter greens as needed: kale, chard, leeks, Brussels sprouts
- Mulch garlic beds with leaves or straw after ground freezes
- Clean, oil, and store tools
- Turn compost pile for the last time before cold weather
- Review the season and make notes for next year
- Build new beds and infrastructure during dry spells
- Order seed catalogs for January planning
- Protect tender plants with row covers if needed
December
The quiet season. Harvest continues from hardy crops while planning for next year begins.
- Continue harvesting kale, leeks, and other hardy crops
- Monitor stored vegetables and remove any spoiling
- Review last year’s garden plan and results
- Research new varieties to try
- Dream, plan, and anticipate the coming growing season
- Give gardening gifts (and ask for them)
- Check on overwintering crops during mild spells
- Enjoy the rest—the busy season returns in February
Essential Gardening Tools for Beginners
Quality tools make gardening easier, last for years, and actually save money compared to replacing cheap tools repeatedly. Here are the essentials every Pacific Northwest gardener needs:
Digging and Cultivating Tools
- Digging fork: More useful than a spade in our clay soils, a digging fork loosens soil without compacting it. The tines slide through heavy soil that would stick to a spade blade. Use it for turning compost, harvesting potatoes, and loosening compacted beds.
- Spade: A flat-bladed spade edges beds, digs planting holes, and slices through sod. Choose a D-handle or T-handle based on personal preference.
- Garden rake: An iron rake levels beds, removes debris, and creates fine seedbeds. The bow-style rake is more durable than welded versions.
- Hand trowel: Essential for transplanting and small digging tasks. Invest in a sturdy forged steel trowel with a comfortable grip—you’ll use it constantly.
- Hand cultivator: The three-tined cultivator loosens soil around plants and breaks up surface crusts. Some gardeners prefer a Korean hand plow (hori-hori) for its versatility.
Cutting Tools
- Pruning shears: Also called secateurs, these cut stems up to 1/2 inch thick. Bypass pruners (with scissor-like action) make cleaner cuts than anvil pruners. Keep them sharp for clean cuts that heal quickly.
- Loppers: Long-handled pruners for branches up to 2 inches thick. Essential for maintaining fruit trees and shrubs.
- Garden knife: A sharp knife handles countless tasks: cutting twine, harvesting vegetables, opening seed packets. The hori-hori (Japanese soil knife) combines a knife with a trowel.
Watering Equipment
- Watering can: A 2-gallon can with a fine rose attachment waters seedlings gently. Larger cans are heavy when full.
- Garden hose: Invest in a quality rubber hose—it lasts longer, kinks less, and doesn’t crack in cold weather. A 50-foot hose reaches most residential gardens.
- Adjustable nozzle: A fan spray pattern waters beds without damaging plants. Jet settings help clean tools and pots.
- Soaker hoses or drip irrigation: Efficient watering systems reduce water use and disease by keeping foliage dry. Worth installing before the dry season.
Personal Protection
- Garden gloves: Protect your hands from thorns, soil-borne bacteria, and the drying effects of frequent hand-washing. Leather gloves offer protection for heavy work; nitrile-coated gloves provide grip for wet conditions.
- Knee pads or kneeler: Makes weeding and planting much more comfortable. A kneeling pad that flips into a seat provides versatility.
- Sun protection: A wide-brimmed hat, sunscreen, and sunglasses protect during long gardening sessions. Our mild temperatures make it easy to forget sun protection.
Watering Your Pacific Northwest Garden
Despite our reputation for rain, watering is one of the most important—and most misunderstood—gardening skills in the Pacific Northwest. Our dry summers mean irrigation becomes essential just when plants need water most.
Understanding Plant Water Needs
Different plants have different water requirements, and those requirements change through the growing season. Newly transplanted seedlings need frequent watering until roots establish. Mature plants with deep roots can go longer between waterings. Fruiting plants (tomatoes, squash, peppers) need consistent moisture during fruit development.
Most vegetables need 1-2 inches of water per week during the growing season. In our dry summers, that means irrigation because rainfall provides little to nothing. A rain gauge helps track exactly how much water your garden receives.
Deep Watering vs. Frequent Watering
The single most important watering concept is deep watering. Applying water deeply but less frequently encourages roots to grow deep into the soil, where moisture persists longer and temperatures remain stable. Shallow, frequent watering keeps roots near the surface, where they’re vulnerable to heat and drought.
To water deeply:
- Apply water slowly so it soaks in rather than running off
- Water until moisture reaches 6-12 inches deep (check with a trowel or soil probe)
- Allow soil to partially dry between waterings—roots need oxygen too
- Mulch to reduce evaporation and keep soil moisture stable
When to Water
Morning is the ideal time to water. Plants take up water efficiently in the cool morning hours, and any moisture on foliage dries quickly as temperatures rise. This reduces disease risk from prolonged wet conditions.
Evening watering, while convenient for gardeners, leaves foliage wet overnight—an invitation for fungal diseases. In our climate where late blight is already a concern, wet foliage overnight increases disease pressure significantly.
Midday watering isn’t harmful to plants (the old “water drops act like magnifying glasses” myth is false), but it’s less efficient because evaporation is highest.
Irrigation Systems
Hand watering works for small gardens but becomes impractical as gardens grow. Consider these irrigation options:
Soaker hoses release water slowly along their length, delivering moisture directly to soil without wetting foliage. Lay them under mulch for maximum efficiency. Inexpensive and easy to install, though they require monitoring for even coverage.
Drip irrigation delivers water precisely to individual plants through emitters on tubing. More expensive and complex to install but extremely efficient. Ideal for permanent beds and container gardens. Timers automate watering.
Overhead sprinklers are convenient but waste water to evaporation and wet foliage, increasing disease risk. Best reserved for lawns and new seedlings that benefit from gentle, even coverage.
Managing Pests and Diseases
Every garden hosts insects and microorganisms—most are beneficial or neutral. The goal isn’t eliminating all pests (impossible and unnecessary) but maintaining balance so plants can thrive. Understanding common Pacific Northwest pest and disease problems helps you prevent them before they cause significant damage.
Common Pacific Northwest Pests
Slugs and Snails
Our wet climate creates ideal conditions for these moisture-loving mollusks. Slugs cause more damage in Pacific Northwest gardens than any other pest, destroying seedlings overnight and riddling mature plants with holes.
Prevention and control:
- Remove hiding places: boards, debris, and dense ground covers near the garden
- Water in the morning so soil surface dries by evening
- Use copper tape around raised beds—slugs avoid crossing it
- Handpick slugs in the evening when they’re active
- Set beer traps (shallow dishes of beer attract and drown slugs)
- Apply iron phosphate bait (Sluggo)—safe for pets and wildlife
- Encourage natural predators: ground beetles, birds, garter snakes
Aphids
These small, soft-bodied insects cluster on new growth and undersides of leaves, sucking plant sap. They multiply rapidly, especially in spring. Aphids spread viral diseases and excrete honeydew that attracts ants and supports sooty mold.
Prevention and control:
- Encourage beneficial insects: ladybugs, lacewings, and parasitic wasps prey on aphids
- Blast them off plants with a strong spray of water
- Apply insecticidal soap to severe infestations
- Remove heavily infested plant parts
- Avoid over-fertilizing with nitrogen, which promotes the tender growth aphids prefer
Cabbage Worms and Loopers
These green caterpillars devastate cabbage family plants (broccoli, kale, Brussels sprouts, cauliflower). Adults are white or brown moths that lay eggs on leaf undersides.
Prevention and control:
- Cover plants with floating row cover immediately after transplanting
- Handpick caterpillars and destroy eggs
- Apply Bacillus thuringiensis (Bt)—a bacterial insecticide specific to caterpillars
- Encourage parasitic wasps by planting flowers they need
Carrot Rust Fly
The larvae of this small fly tunnel through carrots, leaving rust-colored damage. Damage often isn’t visible until harvest. A significant pest in Pacific Northwest gardens.
Prevention and control:
- Cover carrots with floating row cover at planting time
- Delay planting until after the first generation (mid-June)
- Harvest carrots by early fall before second generation matures
- Rotate planting locations each year
Common Pacific Northwest Diseases
Late Blight
The disease that caused the Irish Potato Famine thrives in our cool, wet conditions. It affects tomatoes and potatoes, causing water-soaked lesions on leaves that quickly spread. Entire plants can collapse within days under favorable conditions. Spores spread on wind and water, making late blight nearly impossible to stop once it appears.
Prevention and control:
- Choose resistant varieties when available
- Water at soil level, never overhead
- Space plants for good air circulation
- Remove and destroy (don’t compost) infected plant material immediately
- Apply copper fungicide preventively during wet periods
- Pull entire plants at first sign of infection to protect neighbors
Powdery Mildew
This fungal disease covers leaves with a white powdery coating. Common on squash, cucumbers, and peas, especially late in the season. While unsightly, powdery mildew rarely kills plants—it just reduces vigor and yield.
Prevention and control:
- Choose resistant varieties
- Ensure good air circulation
- Remove heavily infected leaves
- Apply milk spray (40% milk, 60% water) as a preventive
- Baking soda spray (1 tablespoon per gallon of water plus a drop of dish soap) can slow spread
Damping Off
This fungal disease kills seedlings before or shortly after emergence. Stems rot at soil level, and seedlings topple over. Common in cool, wet conditions with poor air circulation—exactly what we have during seed-starting season.
Prevention:
- Use sterile seed-starting mix, not garden soil
- Don’t overwater seedlings
- Provide good air circulation (a small fan helps)
- Keep seedlings under strong light to promote sturdy growth
- Don’t plant seeds too deeply
Integrated Pest Management
Rather than reaching for pesticides at the first sign of trouble, integrated pest management (IPM) uses a combination of approaches:
- Prevention: Choose resistant varieties, rotate crops, maintain plant health
- Cultural controls: Proper spacing, watering, and sanitation reduce pest problems
- Biological controls: Encourage natural predators and parasites
- Physical controls: Row covers, traps, and handpicking
- Chemical controls: Use only when necessary, starting with least-toxic options
A healthy garden ecosystem maintains its own balance. Pesticides, even organic ones, disrupt that balance by killing beneficial insects along with pests. Building healthy soil, choosing appropriate plants, and encouraging biodiversity creates gardens where pests remain minor annoyances rather than major problems.
Mulching for Garden Success
Mulch—material spread on the soil surface around plants—is one of the gardener’s most valuable tools. In the Pacific Northwest, mulch serves different purposes across the seasons: conserving summer moisture, suppressing weeds, moderating soil temperature, and protecting plants during winter.
Types of Mulch
Organic mulches break down over time, adding organic matter to the soil:
- Straw: Excellent for vegetable gardens. Apply 4-6 inches around established plants. Source seed-free straw to avoid weed problems.
- Leaves: Free and abundant in fall. Shred leaves before applying or they mat and shed water. Leaf mold (decomposed leaves) makes excellent mulch.
- Wood chips: Long-lasting and attractive. Use around perennials and shrubs. Apply 3-4 inches. Fresh chips temporarily tie up nitrogen—don’t mix into soil.
- Grass clippings: Apply thin layers (1-2 inches) and let dry before adding more. Thick applications mat and smell. Use only from pesticide-free lawns.
- Compost: Provides nutrients while mulching. Apply 2-3 inches. The best mulch for established vegetable beds.
Inorganic mulches don’t decompose:
- Black plastic: Warms soil for heat-loving crops and suppresses weeds. Doesn’t allow rain penetration—requires drip irrigation underneath. Remove at season’s end.
- Landscape fabric: Suppresses weeds but allows water penetration. Degrades in sunlight—cover with decorative mulch. Works well for paths.
- Gravel: Appropriate for Mediterranean herb gardens. Reflects heat and provides excellent drainage. Difficult to remove once installed.
Mulching Techniques
- Apply mulch after soil warms in spring (late May in Seattle area)
- Keep mulch away from plant stems to prevent rot
- Apply 2-4 inches of organic mulch around vegetables
- Replenish as mulch decomposes
- Remove or rake aside mulch in spring to allow soil warming
Year-Round Gardening in the Pacific Northwest
One of the Pacific Northwest’s greatest gardening advantages is the potential for year-round production. While winter growth slows dramatically, hardy crops planted in late summer and fall provide harvests through the coldest months. With planning, Pacific Northwest gardeners enjoy homegrown vegetables every month of the year.
Winter Vegetables
These crops survive our winters and provide fresh harvests when little else grows:
- Kale: The ultimate winter vegetable. Frost actually improves flavor by converting starches to sugars. Lacinato and Red Russian varieties are particularly cold-hardy.
- Leeks: Harvest as needed from fall through spring. Extremely cold-tolerant.
- Brussels sprouts: Harvest from November through February. Frost improves flavor dramatically.
- Winter lettuce: Varieties like Winter Density and Rouge d’Hiver survive frosts under row cover.
- Mache (corn salad): This mild green actually prefers cold conditions and self-seeds readily.
- Parsley: Overwinters with minimal protection, providing fresh leaves when needed.
- Chard: Though growth slows, chard survives most Pacific Northwest winters.
Extending the Season
Simple structures extend the growing season in both directions:
Row covers (floating row cover, reemay) provide 2-4 degrees of frost protection while allowing light and water penetration. Drape over hoops to keep fabric off plants. Essential for protecting tender transplants and extending fall harvests.
Cold frames are bottomless boxes with transparent lids that capture solar heat. They protect crops from frost and wind while maintaining warmer daytime temperatures. Use for hardening off transplants, overwintering salads, and starting early spring crops.
Low tunnels are hoop structures covered with plastic or row cover. Easy to build and move, they create mini-greenhouses over garden beds. Ventilate on sunny days to prevent overheating.
Greenhouses provide the ultimate season extension, allowing year-round growing of warm-season crops. Even an unheated greenhouse maintains temperatures 10-15 degrees warmer than outside, protecting against frost and enabling early starts.
Common Beginner Mistakes (And How to Avoid Them)
Everyone makes mistakes when learning to garden. Understanding common pitfalls helps you avoid them:
Planting Too Much, Too Soon
Enthusiasm leads many beginners to plant more than they can maintain. Start small—a 4×8 bed is plenty for your first season. You can always expand, but you can’t easily recover from the frustration of an overwhelming garden.
Planting Too Early
Pacific Northwest springs tease gardeners with warm, sunny days that feel perfect for planting. But soil temperature, not air temperature, determines planting success. Wait until soil reaches 60°F for warm-season crops, even if air temperatures are higher.
Underwatering (or Overwatering)
Our rainy reputation leads some gardeners to neglect irrigation during the critical dry summer months. Others, nervous about drought, water so frequently they drown plant roots. Water deeply but less frequently, checking soil moisture before watering.
Ignoring Soil Health
Plants grow in soil, not dirt. Investing in soil quality—through compost additions, cover crops, and proper amendments—pays dividends for years. Skipping this step leads to perpetual struggles with fertility and plant health.
Skipping Pest Prevention
It’s much easier to prevent pest problems than to cure them. Install row covers, encourage beneficial insects, and practice crop rotation before problems develop. Once pests establish, control becomes difficult and often requires multiple approaches.
Neglecting Record-Keeping
Memory fades quickly. Keep notes on what you planted, when you planted it, what worked, and what failed. These records become invaluable reference material for improving your garden year after year.
Next Steps for New Gardeners
Gardening is a lifetime learning journey. This guide provides a foundation, but continued learning enhances your success and enjoyment. Consider these resources:
Local Resources
- WSU Extension Master Gardeners: Free gardening advice through clinics and hotlines throughout King County and beyond
- Seattle Tilth: Classes, workshops, and resources for urban gardeners
- Local nurseries: Staff at specialty nurseries provide region-specific advice
- Community gardens: Learn from experienced gardeners while growing your own plot
- Public libraries: Extensive gardening book collections, often with Pacific Northwest sections
Recommended Reading
- Growing Vegetables West of the Cascades by Steve Solomon: The definitive guide to Pacific Northwest vegetable gardening
- The Maritime Northwest Garden Guide by Seattle Tilth: Month-by-month planting and care guidance
- Cool Flowers by Lisa Mason Ziegler: Growing cut flowers in cool climates
- The Vegetable Gardener’s Bible by Ed Smith: Excellent general vegetable gardening reference
Online Resources
- WSU Extension publications (pubs.extension.wsu.edu)
- OSU Extension publications (catalog.extension.oregonstate.edu)
- Local gardening forums and social media groups
The most important step is simply to begin. Gardening rewards both effort and patience. Some seasons will bring bumper harvests; others will teach hard lessons. Through it all, you’ll develop skills, intuition, and connection to the land that no guide can fully capture. Welcome to Pacific Northwest gardening—may your garden bring you joy, nourishment, and countless hours of satisfying work.

Stay in the loop
Get the latest the gardening nook updates delivered to your inbox.